Getting started with the Studio
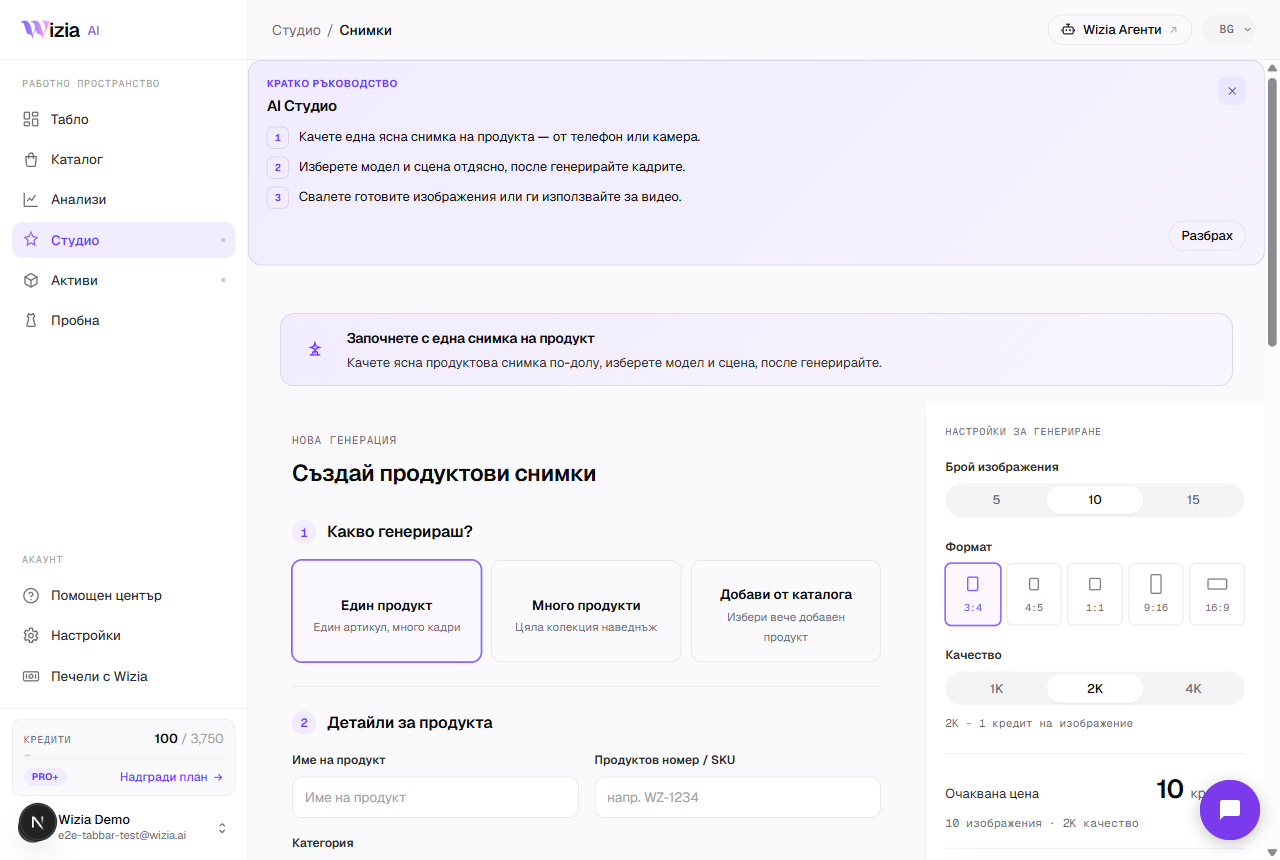
The Studio turns plain photos of your product into professional shots with an AI model, scene, and pose of your choice. No photographer, studio, or model needed — just a few clear photos of the item. Here is how your first generation goes, start to finish.
Create a new product
From the menu, open Studio and choose “New generation”. Pick the “Single product” mode, enter a name, and select the item's category — tops, shirts, dresses, shoes, pants, swimwear, accessories, and more. The category shapes how the AI understands the product, so pick it precisely.
Upload the product photos
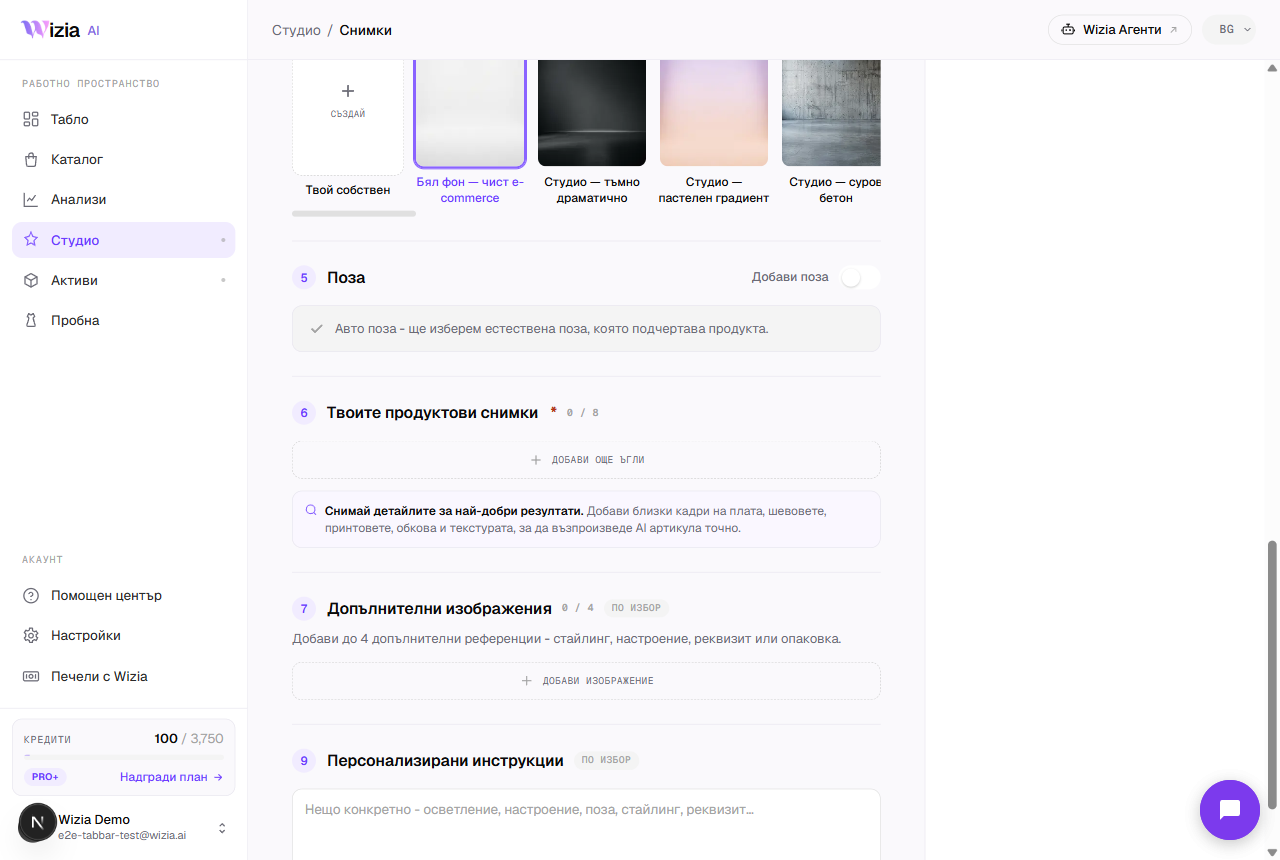
Upload a few photos from different angles (JPG, PNG, WebP, or HEIC). Optionally add extra close-ups of fabric, seams, and prints — they help the AI reproduce the item faithfully. See “Uploading product photos for the best results” for concrete tips.
Pick a model, scene, and pose
- 1
Model
Choose an AI model from the library. You can also switch the model off — the product is then generated on its own, on a clean background.
- 2
Scene
Choose a background and setting — the list filters to match your product's category.
- 3
Pose (optional)
Pick a pose or leave “Auto pose” — we choose a natural pose that flatters the product.
Settings and cost
Choose the number of shots and the quality. One shot costs 1 credit at 1K and 2K, and 2 credits at 4K — the total shows before you start. Example: 15 shots at 2K cost 15 credits. Press Generate and wait — the shots appear in the product's gallery.
After the generation
Every shot can be regenerated individually if you don't like it — the first regeneration of a shot is free (up to 3 per generation), and Pro plans and above get unlimited regenerations. Download the finished photos one by one or all at once, and from the Video tab you can create an AI video of the product for 35 credits.