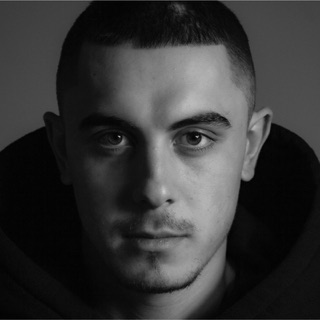
Four ways to get an AI fashion model
| Route | How it works | Good for | Watch out for |
|---|---|---|---|
| General image AI | You write a prompt in a chat or image tool and attach a product photo | Ideas, mood boards, social posts | The garment often changes: color, print and cut drift between images |
| Library model in a fashion tool | You upload the product photo and pick a ready model, scene and pose | Everyday catalog images for every new product | Other stores can pick the same model |
| Custom model in a fashion tool | You describe a model, preview it, adjust and save it to your library | A face that belongs to your brand | Takes some testing and is usually on higher plans |
| Digital twin of a real person | A real model is scanned or photographed and agrees to an AI version | Brands that already work with a known model | Needs the person's consent and a clear agreement on pay and use |
For most online stores the second route is the place to start, and the third comes later, once you know which look you want to keep. The first route is useful for ideas, but it is the hardest to use for product pages, because a shopper must receive exactly the garment shown in the image.
Step by step: from one product photo to on-model photos
Photograph the real garment
Lay it flat or hang it on a plain hanger, in daylight, on a plain background, with the whole garment in the frame. No person in the shot.
Add detail shots
A back view and close-ups of fabric, print, buttons or hardware help the AI reproduce the garment faithfully.
Choose the product category
Pick the exact category, such as dresses, shirts, coats or swimwear. The category shapes how the AI understands the product.
Pick the model, scene and pose
Choose a model from the library, a background that suits your store and a pose, or leave the pose on automatic.
Generate a small set first
Start with a few images at 2K, check them, and only then generate a full set for the product.
Compare with the real garment
Check color, length, print and details against the garment in daylight before you publish.
In Wizia AI Studio this is the whole workflow: one upload, a few choices and the images appear in the product's gallery. A 2K image costs 1 credit and a 4K image costs 2 credits, and the total shows before you start. If a shot is not right, the first regeneration of a shot is free, up to three per generation, and Pro plans and higher get unlimited regenerations.
The input photo decides most of the result
An AI fashion model wears what it sees. If the photo shows a creased shirt under yellow light, the model wears a creased shirt in the wrong color. Good input photos are cheap to make and save more time than any setting in the tool.
- Daylight, no direct sun. A window or outdoor shade gives even, true color.
- Plain background. A white sheet or a clean wall helps the AI separate the garment from its surroundings.
- Whole product. Do not crop sleeves, hems, straps or soles. The AI cannot know what is missing.
- No filters. A filter that warms the image also changes the garment's color in every generated photo.
- Flat or hanger. A garment laid flat or on a hanger, without a person, gives the cleanest result.
A phone is enough. Our page on flat lay to model explains the input style in more detail.
Creating your own custom AI model
A library model is ready to use, but another store may choose the same one. A custom model is a face and figure you describe yourself and keep in your own library. In Wizia, custom models, scenes and poses are available on the Pro+, Business and Enterprise plans, and the process has two steps.
- Describe the model. Give it a name and a description in English: looks, hair, skin tone and build. The more specific the description, the more predictable the result.
- Generate a preview. Look at the result, adjust the description and regenerate until you like it, then save. The model then appears in your library and you can pick it in any generation.
Wizia's AI models are adults. Describe adult models only, and never try to recreate a real, identifiable person without their consent.
How to write a good model description
Descriptions that work are concrete and visual. They describe what a camera would see, not a personality. Compare these two made up examples:
- Vague: "a beautiful, confident woman". Every generation will interpret that differently.
- Concrete: "woman in her early thirties, shoulder length dark brown hair, light olive skin, medium build, natural makeup". This gives a stable result you can reuse.
A few habits help:
- Describe age as an adult range, hair length and color, skin tone and build.
- Keep styling out of the model description. The clothes come from your product photo, and the setting comes from the scene.
- Change one thing at a time when you adjust, so you know what made the difference.
- Think about your customers. A model that looks like the people who buy from you usually works better than an idealised one.
Once you have a custom model, keep it consistent across your catalog. Our article on a consistent AI model for your brand covers the style guide and the habits that keep a catalog looking like one brand.
Checks before you publish
AI images look finished at first glance, which is exactly why they need a careful second look. Before an image goes to your store, check:
- Color. Compare the image with the real garment in daylight, not with the product photo on your screen.
- Length and fit. A dress that ends above the knee must not end below it in the image.
- Print and text. Logos, letters and repeated patterns should match the garment.
- Details. Count buttons, check pockets, zips and straps.
- Hands and edges. Look at hands, hair and the edges of the garment at full zoom.
If something is wrong, check the input photo first. A better photo fixes more than repeated regenerations from the same photo. An image that misrepresents the product leads to returns and lost trust, so when in doubt, leave it out.
Common mistakes
- Using a mockup or a supplier image as input. The AI then shows the template, not your product. Photograph the real item.
- A new model for every product. The catalog starts to look random. Pick one or two models and stick to them.
- Skipping the category. A wrong category can put the garment on the body in the wrong way.
- Publishing watermarked images. Free plan images carry a watermark; use a paid plan for images that go live.
- Editing body proportions. Keep the model believable. Exaggerated figures mislead shoppers about fit.
- Copying a real person. Do not describe a celebrity or another brand's model. Use library or custom models instead.
What it costs to create AI fashion models
With a library model you pay only for the images you make. As a made up example, a store that adds 30 products a month with three on-model photos and one studio image each needs 120 images, which is 120 credits a month at 2K.
The Free plan includes 20 one-time credits to test on your own garments, with a watermark. Starter costs €20 a month and includes 150 credits, which covers the example above. Pro costs €98 a month and includes 750 credits. Custom models start with Pro+, which costs €298 a month and includes 2300 credits. Full resolution exports are on Starter and higher. The pricing page lists every plan, and the terms explain how you may use the images you generate.
Where to go next
If you are new to AI models, read how AI fashion models work for each product category, and what on-model photography is. For the bigger picture, including ethics and how large brands use AI models, go back to our guide to generative AI in fashion.